Quickbooks Desktop to Online Migration: a Complete Guide

Would you like to access QuickBooks from anywhere? Get ready for QuickBooks desktop to online migration with us. Walk through the guide and follow the process of migration.
Unaware of the migration process in QuickBooks, many users start over their accounts. It is truly hectic that they often face loss of data and feel stuck in the middle of the process. Good news! You can easily and almost everything migrate from QuickBooks Desktop to QuickBooks Online.
Let’s get started!
When to Convert Quickbooks Desktop To Online?
It’s a good idea to migrate the Quickbooks desktop to online company. But, is the hassle worth it? This can only be decided when you are aware of the complexity of your company file. Yes, it is one of the crucial factors in any QuickBooks migration.
Suppose you are a small business thus, the company file will be less complex. On the other hand for any large business (using QuickBooks enterprise), the company file on the desktop would be large and complex. It is because the company file contains employee information, customer lists, inventory, accounting records, banking history, and so on.
However, like Quickbooks desktop pro, Premier, and Premier account, you can convert QuickBooks desktop enterprise to online. You will have to go through an additional setup and that’s all.
Other major reasons to migrate QuickBooks desktop to online:
- Get access to QuickBooks anywhere in the world.
- Other people in your accounting firm can also access it from their respective places.
- Data security is under the control of Inuit.
- Reduced data entry because it distinguishes bank data and credit card transactions. Further, eliminates any clerical errors to enhance productivity.
Migrate Quickbooks Desktop to Online
Below mentioned steps are to convert QuickBooks desktop to online for desktop pro, premier and accountant versions.
Note: It is recommended to backup your company file’s data before you migrate Quickbooks desktop to online. In addition, keep your QuickBooks desktop updated beforehand so it does not interrupt while migrating data.
Steps to Backup Your Company File:
The following are useful whenever you want to backup QuickBooks company files. You can always save a copy when preparing for migration.
- Launch QuickBooks and see if you are in multi-user mode.
- Go to File and select Switch Single-user mode.
- Again tap on the File.
- Select Backup Company.
- Then, select the option Create a Local Backup.
- In the new windows, tap Local Backup and then click Next.
- In the Local Backup Only, select Browse to select the place you want to save backup
- Select the number of backups (optional).
- Test the backup file by opening it to see if all data is backed up correctly.
- Tap Ok for a test run.
- Then tap Save it now and tap Next.
Once done, you can follow the steps for Quickbooks Desktop to online migration.
Step 1: Configure Target Requirement
While converting QuickBooks desktop to online, file size does not matter. Instead, it is the target that does.
Hence, while moving to QuickBooks online, make sure the target doesn’t exceed the limits for QuickBooks versions as given below:
- Quickbooks desktop enterprise 2021 with the latest release: 750,000
- Quickbooks desktop pro and premier 2021 with the latest release: 750,000
- Quickbooks desktop enterprise 2020 and older: 350,000
- Quickbooks desktop pro and premier 2018 and older: 350,000
Tip: You can try to reduce the targets by condensing your QuickBooks company file.
Step 2: Create a Quickbooks Online Account
You should have an online Quickbooks account for data migration. If you don’t have an account already, you can visit QuickBooks online. Select the QuickBooks version that matches your demands and needs.
While signing up for QuickBooks online give details about your business like business name and description.
Step 3: Export Company Files
Export the company file data from QuickBooks desktop to QuickBooks Online. Here, you will have to choose the company file you want to transfer to quickbooks online.
Thus, to learn How to transfer quickbooks desktop to online follow the steps given below:
- Go back to your QuickBooks desktop.
- Log in to the company file you want to convert online.
- Now, tap on the company placed on the top menu bar.
- Then, tap on the option Export Your Company file to Quickbooks Online.
- If your QuickBooks is not updated to the latest release, you may not see this option.
- Head to the help menu to select Update QuickBooks.
- Once done, reopen QuickBooks desktop company to export company files.
Step 4: Log in to Quickbooks Online Account Via Desktop
When exporting data QuickBooks desktop will ask you whether to proceed or try migration first. Since you have created an account, here is How to transfer quickbooks desktop to online:
- Login to QuickBooks company online.
- click Move Now.
- To import inventory click, Yes or you can import it later by clicking No.
- When prompted for the QuickBooks online account, select Yes, sign me in.
- A log-in screen will appear on your QuickBooks Desktop account. Enter your login credentials and tap Sign in.
- Verify your identity by entering the code.
Step 5: Choose Your Company in Quickbooks Online
Once you have logged in successfully, it’s time to select the company in QuickBooks Online. This company file is where your data will transfer from Quickbooks desktop to an online account.
Choose the correct company if you have access to multiple companies. Remember that it will replace that particular company’s data with QuickBooks desktop data. Hence, you can otherwise create a new company.
Step 6: Copy Company Data File
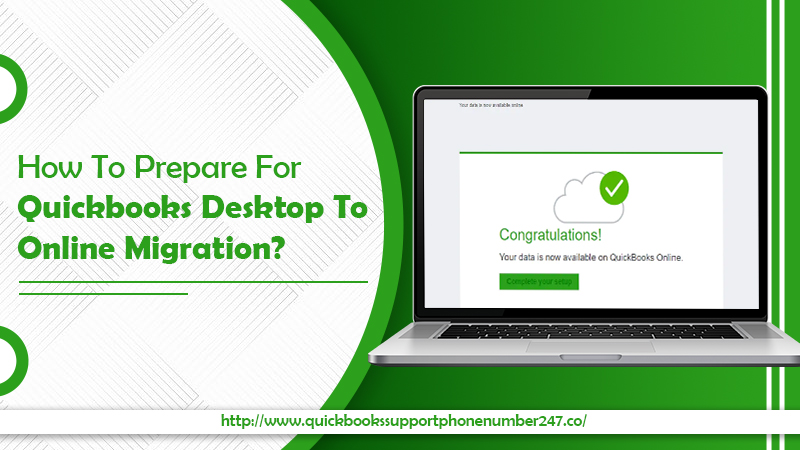
Now, after you select the company file, the data will get copied sometime. As it’s done, you will get a confirmation message notifying you that the process is completed successfully.
Further, QuickBooks also sends the QuickBooks company file in your mail. However, it may take several hours depending on your company file size and targets.
When you receive the mail, select Complete your setup and login to your QuickBooks online to review the data.
Also Read : Quickbooks Migration tool
Winding up!
We hope the guide on how to perform Quickbooks Desktop to online migration helped you. The process requires patients to complete the entire process efficiently. However, if you are busy and can’t spare time, we will help you convert your desktop company file to online. We are always ready to assist you!